
This manual provides a comprehensive guide for maintaining and repairing 150cc scooters, covering engine basics, troubleshooting, and essential safety tips for DIY enthusiasts and mechanics.
1.1 Overview of the 150cc Scooter Engine
The 150cc scooter engine, commonly a GY6 type, features a 4-stroke, single-overhead-cam design, providing efficient power and reliability. It includes a CVT transmission, ensuring smooth acceleration. Key components like the cylinder, piston, and crankshaft are designed for durability. The engine’s compact size and fuel-efficient operation make it ideal for scooters, while its simple design allows for easier maintenance and repair as outlined in service manuals.
1.2 Importance of Regular Maintenance
Regular maintenance is crucial for extending the lifespan of your 150cc scooter. It ensures optimal performance, prevents mechanical failures, and enhances safety. Neglecting routine checks can lead to costly repairs. Adhering to the service manual’s guidelines helps maintain reliability and fuel efficiency, ensuring your scooter runs smoothly for years to come.
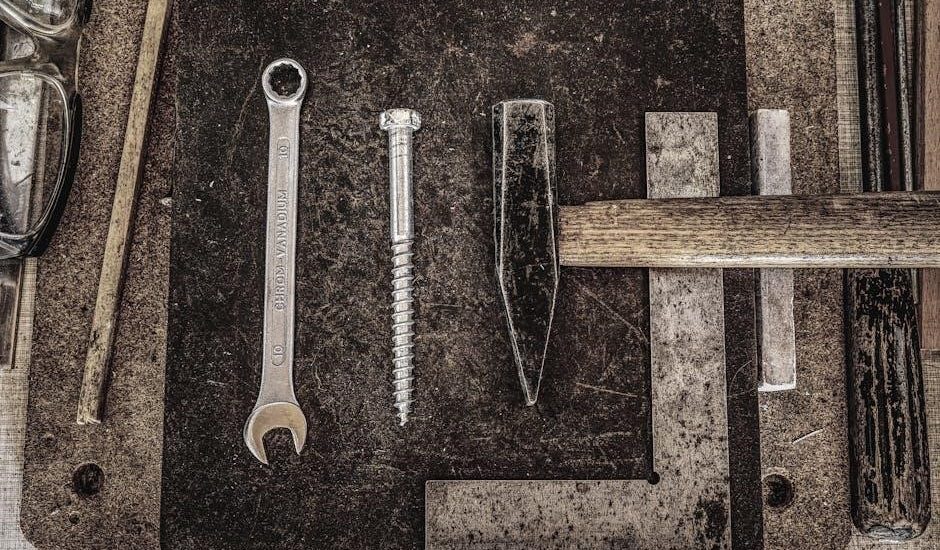
Essential Tools and Safety Precautions
Essential tools include screwdrivers, wrenches, pliers, and a multimeter. Always wear gloves and goggles for safety. Ensure the scooter is stable and disconnect the battery before starting repairs.
2.1 Tools Required for Scooter Repair
Essential tools for scooter repair include screwdrivers, wrenches, pliers, and a multimeter. A socket set, torque wrench, and tire pressure gauge are also necessary. Ensure you have gloves and safety goggles for protection.
- Screwdrivers (flathead and Phillips)
- Socket set and ratchet
- Wrenches (adjustable and Allen key)
- Pliers and punches
- Multimeter for electrical diagnostics
Refer to your scooter’s manual for specific tool recommendations.
2.2 Safety Guidelines for Working on Scooters
Always wear protective gear, including gloves and safety goggles. Disconnect the battery before starting repairs to prevent electrical shocks. Use jack stands for stability when lifting the scooter. Ensure proper ventilation to avoid inhaling harmful fumes. Follow manual instructions carefully and avoid improvised tools. Regularly inspect tools and equipment for damage.
- Disconnect the battery first
- Use jack stands for support
- Wear protective gear
- Avoid working in enclosed spaces

Engine Maintenance and Repair
Regular oil changes, carburetor adjustments, and spark plug replacements are essential for optimal engine performance. Proper maintenance ensures longevity and prevents costly repairs.
3.1 Oil Change and Lubrication System
Regular oil changes are crucial for maintaining the health of your 150cc scooter’s engine. Use high-quality 10W-30 or 10W-40 oil, as specified in the service manual. Drain the old oil, replace the oil filter, and refill with fresh lubricant. Proper lubrication ensures smooth engine operation and prevents wear on moving parts.
Always refer to the manual for specific guidance on oil capacity and viscosity recommendations to maintain optimal performance and longevity.
3.2 Carburetor Troubleshooting and Adjustment
Common issues with the carburetor include poor engine performance, rough idling, or difficulty starting. Check for clogged jets or improper fuel flow. Adjust the air-fuel mixture by turning the idle screw. Ensure the choke is functioning correctly. Refer to the manual for specific adjustment procedures. Proper tuning ensures optimal engine performance and prevents damage to the scooter’s engine.
3.3 Spark Plug Replacement and Ignition System
Spark plug replacement is essential for maintaining proper engine performance. Remove the spark plug using a socket wrench and inspect for wear or fouling. Install a new spark plug with the correct gap specification. Check the ignition system for proper spark generation and ensure all connections are secure. Regular maintenance prevents misfires and ensures reliable engine operation, as outlined in the manual for optimal scooter functionality.

Transmission and Drive System
This section covers CVT maintenance, drive belt replacement, and transmission component inspection to ensure smooth power delivery and optimal scooter performance, including lubrication and common issue diagnostics.
4.1 Belt Replacement and CVT Maintenance
Regular inspection and replacement of the drive belt and CVT components are crucial for maintaining smooth power transmission. This section guides you through belt removal, pulley inspection, and proper installation techniques. Proper alignment and tensioning ensure optimal performance and prevent premature wear. Tools and steps are outlined to help you perform these tasks efficiently and safely, avoiding costly repairs and ensuring reliability.
4.2 Checking and Replacing the Drive Belt
Inspect the drive belt for cracks, fraying, or excessive wear. Replace it if damaged or worn beyond the manufacturer’s recommended thickness. Use a belt tension gauge to ensure proper tension. Tools like a socket wrench and new belt are essential. Follow the manual’s step-by-step guide for removal and installation. Proper alignment and tensioning prevent slippage and extend the belt’s lifespan, ensuring smooth scooter performance and reliability.

Electrical System Diagnosis
Learn to identify and repair electrical issues, including battery maintenance, charging system checks, and ignition troubleshooting. This section helps diagnose common faults in the scooter’s electrical components effectively.
5.1 Battery Maintenance and Charging System
Proper battery care is crucial for optimal scooter performance. This section details how to charge, test, and maintain the battery, ensuring reliable power delivery. Learn to identify common issues like drained cells or faulty charging systems and discover effective solutions to keep your scooter’s electrical system running smoothly and efficiently at all times.
5.2 Troubleshooting Electrical Issues
This section guides you through diagnosing common electrical problems, such as faulty wiring, blown fuses, or malfunctioning sensors. Learn step-by-step techniques to identify and repair issues, ensuring your scooter’s lights, ignition, and accessories function correctly. Tips for using multimeters and circuit testers are included to help you resolve electrical faults efficiently and safely, keeping your scooter in top condition.
Brake System Service
This section covers essential brake system maintenance, including pad replacement and fluid checks, ensuring optimal safety and performance for your 150cc scooter.
6.1 Front and Rear Brake Pad Replacement
Replacing brake pads on your 150cc scooter involves removing the wheel, detaching the brake caliper, and installing new pads. Ensure proper alignment to avoid rotor damage. Always use genuine parts for optimal braking performance and safety. Refer to the manual for specific torque values and reassembly steps to maintain reliability.
6.2 Brake Fluid Check and Replacement
Regularly inspect the brake fluid level and condition, ensuring it meets the manufacturer’s specifications. Replace the fluid every 12,000 to 15,000 miles or as indicated in your scooter’s manual. Use a clean container to prevent contamination and choose the recommended DOT 3 or DOT 4 fluid type. Always consult the service manual for precise instructions and safety guidelines.

Suspension and Steering
This section covers the inspection, adjustment, and maintenance of your scooter’s suspension and steering system, ensuring optimal stability and handling. Regular checks of shock absorbers and forks are essential.
7.1 Adjusting the Rear Shock Absorber
Adjusting the rear shock absorber ensures proper damping and ride comfort. Start by loosening the locknut, then turn the preload adjuster to achieve the recommended setting. Tighten the locknut securely after adjustment. Regular checks are crucial to maintain optimal suspension performance and prevent excessive wear on other components. Always refer to the manual for specific settings and procedures.
7.2 Checking and Replacing the Front Fork
Inspect the front fork for leaks, dents, or excessive wear. If damage is found, replace the fork seal or entire unit. Use a fork seal replacement kit and follow manual instructions for proper installation. Regular lubrication of moving parts ensures smooth operation and prevents corrosion. Always test the fork after replacement to ensure proper functionality and safety.
Common Issues and Troubleshooting
Address typical 150cc scooter issues such as starting problems, overheating, and electrical faults. This section provides diagnostic steps, part inspection, and repair solutions to restore optimal performance.
8.1 Diagnosing Starting Problems
Identify common issues preventing your 150cc scooter from starting, such as a faulty spark plug, dead battery, or malfunctioning ignition system. Check for proper fuel flow and clean the carburetor. Ensure the kill switch and starter motor are functioning correctly. Refer to the manual for step-by-step diagnostic procedures to pinpoint the root cause and restore starting functionality effectively.
8.2 Overheating and Cooling System Issues
Address overheating problems by inspecting the cooling system. Check coolant levels, radiator condition, and fan operation. Ensure proper coolant circulation and look for blockages in hoses or the radiator. Consult the manual for specific diagnostic steps and repair procedures to maintain optimal engine temperature and prevent damage. Regular maintenance can help avoid cooling system failures.
Parts and Accessories
This section covers identifying genuine and aftermarket parts, accessories, and tools. Use the parts catalog for compatibility and specifications. Refer to resources like Cyclepedia and service manuals for detailed information.
9.1 Finding Genuine and Aftermarket Parts
Genuine parts ensure compatibility and reliability, while aftermarket options may offer cost savings. Use the parts catalog in your repair manual to identify correct components. Online marketplaces and scooter forums often provide reviews and recommendations for trusted suppliers. Always verify part numbers and specifications before making a purchase to ensure proper fitment and performance.
9.2 Understanding the Parts Catalog
The parts catalog is a detailed directory listing every component of your 150cc scooter. Organized by sections like engine, chassis, and electrical systems, it provides part numbers, descriptions, and diagrams. This resource helps identify and locate components efficiently, ensuring accurate ordering and installation during repairs. Referencing the catalog is essential for maintaining your scooter and ensuring compatibility of replacement parts.
Advanced Repairs and Overhauls
This section covers advanced procedures for engine overhauls, transmission rebuilds, and complex repairs. Detailed steps and specialized tools are highlighted for experienced mechanics.
10.1 Engine Overhaul and Rebuilding
Rebuilding a 150cc scooter engine requires precision. Start by disassembling the engine, inspecting each component for wear or damage. Replace piston rings, bearings, and gaskets as needed. Reassemble the engine with new seals, ensuring proper torque specifications. Use a service manual for detailed instructions and torque values to ensure a successful overhaul and optimal performance.
10.2 Transmission Overhaul and Repair
Overhauling the transmission involves disassembling the CVT system to inspect and replace worn components like belts, pulleys, and bearings. Use a service manual for specific instructions. Replace the drive belt and ensure proper alignment of variators and clutch components. Reassemble carefully, following torque specifications to restore smooth power delivery and optimize scooter performance.
DIY Repair and Cost Savings
Obtaining a 150cc scooter repair manual empowers owners to save money by performing repairs themselves, avoiding costly mechanic fees, and sourcing affordable parts effectively.
11.1 Saving Money with DIY Repairs
Using a 150cc scooter repair manual, owners can perform routine maintenance and repairs themselves, significantly reducing labor costs. Access to detailed instructions and diagrams enables DIY enthusiasts to source affordable parts and avoid expensive mechanic fees, ensuring long-term savings and scooter longevity.
11.2 Tips for First-Time Scooter Mechanics
Start with basic tools and understand the manual before beginning repairs. Focus on simple tasks like oil changes or spark plug replacements. Always follow safety guidelines and ensure a clean workspace. Consult online forums or videos for additional guidance. Build confidence by tackling small projects first, gradually moving to more complex repairs.