Manual tile cutters, predating digital options, offer precision for home projects․ These tools, like Tile Genie, enable straight, diagonal, and even curved cuts with practice․
What is a Tile Cutter?
A manual tile cutter is a hand-powered tool designed to precisely score and break tiles, offering a cost-effective solution for DIY enthusiasts and professionals alike․ Unlike powered saws, it relies on user force to initiate a clean break along a scored line․
These cutters, sometimes referred to as “snap cutters”, are ideal for ceramic and porcelain tiles, though adjustments may be needed for harder materials․ They provide a controlled method for achieving accurate cuts, essential for projects like backsplashes and floor installations․
Types of Tile Cutters: Manual vs․ Powered
Manual tile cutters excel in affordability and portability, requiring only physical strength for operation․ Conversely, powered tile saws – including wet saws – deliver faster, more complex cuts with less effort․ While manual cutters are suited for straight lines and simpler shapes, powered saws handle curves and intricate designs․
The choice depends on project scale and tile material; manual cutters are great for small jobs, while larger renovations benefit from the speed and versatility of powered options․
Safety Precautions When Using a Tile Cutter
When utilizing a manual tile cutter, always wear safety glasses to protect against flying debris․ Gloves are recommended to prevent cuts from sharp tile edges․ Ensure a stable work surface and maintain firm footing during operation․ Apply even pressure when scoring to avoid breakage and potential injury․
Inspect the cutting wheel for damage before each use․ Never force the cutter; let the tool do the work․ Proper technique minimizes risks and ensures a safe cutting experience․

Understanding Manual Tile Cutter Components
Manual tile cutters feature a cutting wheel, base, scoring mechanism, and breaking jaws․ These parts work together, guided by a ruler, to achieve precise tile separation․
The Cutting Wheel: Materials and Maintenance
The cutting wheel, crucial for scoring, is typically made of tungsten carbide․ Maintaining its sharpness is vital for clean breaks․ Regularly cleaning the wheel removes tile residue, preventing scoring issues․ Lubrication isn’t generally needed, but inspecting for chips or wear is essential․ A dull or damaged wheel necessitates replacement to avoid uneven cuts and potential tile breakage․ Proper care extends the wheel’s lifespan and ensures accurate, efficient tile cutting with your manual tool․
The Base and Scoring Mechanism
The base provides a stable platform for tile placement and scoring․ The scoring mechanism, featuring the cutting wheel, applies focused pressure to create a precise score line․ This mechanism often incorporates a lever or handle for controlled force․ Accurate alignment of the tile against the base’s guide is paramount․ The quality of the base and scoring system directly impacts the cut’s cleanliness and the ease of achieving a successful snap․
The Breaking Jaws: Function and Adjustment
Breaking jaws, positioned after the scoring line, apply opposing pressure to cleanly separate the tile․ Adjustment is crucial; varying tile thicknesses require precise jaw settings․ Improper adjustment leads to chipped edges or incomplete breaks․ Some cutters feature pre-set positions for common tile sizes, while others demand manual calibration․ Ensuring the jaws align perfectly with the score line guarantees a controlled and professional-looking snap, minimizing waste and maximizing accuracy․
Ruler and Measurement System
Manual tile cutters integrate a ruler, typically in inches and millimeters, for precise measurements․ Accurate marking of the cut line is paramount; discrepancies translate to misaligned tiles․ High-quality cutters feature clearly etched markings and a stable ruler base․ Some models offer extendable rulers for larger format tiles․ Consistent measurement, combined with a firm hand during scoring, ensures professional results․ Double-checking measurements before cutting prevents costly errors and wasted material․
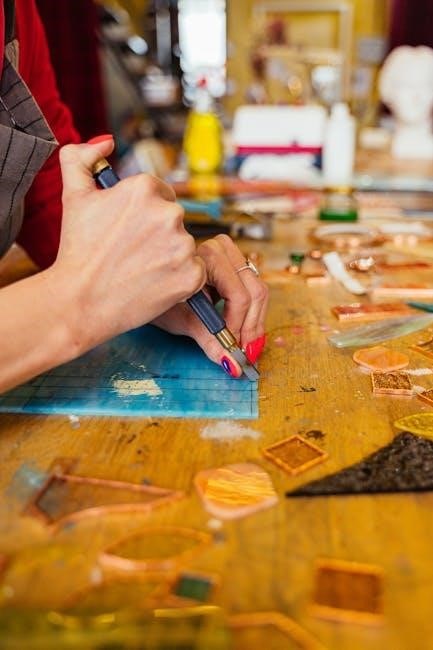
How to Use a Manual Tile Cutter: Step-by-Step Guide
Manual tile cutting begins with marking, positioning, scoring with pressure, and then utilizing the breaking jaws to achieve a clean, snapped separation of the tile․
Preparing the Tile for Cutting
Before initiating any cuts, thoroughly clean the tile surface, removing dust, debris, or any loose particles that could impede a smooth scoring process; Inspect the tile for pre-existing cracks or weaknesses; avoid cutting across these flaws․ Accurately measure and mark the desired cut line using a suitable marker, ensuring clarity for precise scoring․ Consider the tile’s composition – porcelain or glass may require specific preparation techniques, like lubrication, to prevent chipping or uneven breaks․ Proper preparation is crucial for achieving professional-looking results with a manual tile cutter․
Marking the Cut Line Accurately
Precise marking is paramount for successful tile cutting․ Utilize a fine-tipped marker and a straight edge – a ruler or square – to create a clear, unwavering line․ Double-check measurements before marking, accounting for any desired allowances․ For diagonal cuts, ensure the line extends fully across the tile’s surface․ A crisp, visible line guides the scoring wheel, minimizing the risk of wandering and ensuring a clean break․ Accuracy at this stage directly translates to a professional finish, avoiding costly errors․
Positioning the Tile on the Cutter
Carefully align the tile with the marked line directly over the scoring mechanism of the manual cutter․ Ensure the tile sits flat and stable on the base, preventing any wobble during the scoring process․ The scoring wheel should be positioned just before the marked line, ready to initiate the cut․ Confirm the tile’s edge is firmly against the cutter’s guide for a straight, consistent score․ Proper positioning is crucial for a clean, accurate break․
Applying Pressure for Scoring
Once positioned, apply firm, consistent downward pressure on the handle of the manual tile cutter․ This pressure engages the scoring wheel, creating a precise score line across the tile’s surface․ Maintain a smooth, even motion along the entire length of the cut, avoiding stops or starts․ The goal is a single, continuous score – not grinding․ Listen for a crisp scoring sound, indicating successful engagement․
Using the Breaking Jaws to Snap the Tile
After scoring, align the score line with the breaking jaws of the manual tile cutter․ Gently apply pressure to the breaking lever, utilizing the jaws to initiate a clean snap along the scored line․ Avoid excessive force, as this can lead to chipping or uneven breaks․ A smooth, controlled break is crucial for professional-looking results․ Repeat if necessary for multiple sections․

Types of Cuts You Can Make
Manual tile cutters excel at straight and diagonal cuts, though curves are limited․ Rip cuts, for width adjustments, are also achievable with careful scoring․
Straight Cuts: The Basics
Achieving clean, straight cuts with a manual tile cutter begins with accurate marking of the desired line․ Position the tile firmly against the cutter’s guide, ensuring alignment․ Apply consistent, downward pressure while moving the cutting wheel along the marked line – a single, decisive score is key․ Avoid multiple passes, as this can weaken the score․ Finally, utilize the breaking jaws to snap the tile cleanly along the scored line, resulting in a precise, straight edge for your tiling project․
Diagonal Cuts: Techniques and Tips
Executing diagonal cuts with a manual tile cutter demands careful technique․ Precisely mark the diagonal line, then rotate the tile to align it optimally with the cutter’s scoring wheel․ Maintain firm pressure throughout the scoring process, mirroring the straight-cut method․ Utilize the breaking jaws, applying pressure strategically to encourage a clean break along the diagonal score․ Practice is crucial, as diagonal cuts require a steady hand and controlled force for optimal results․
Curved Cuts: Limitations and Workarounds
Manual tile cutters inherently struggle with true curved cuts due to their linear scoring mechanism․ Achieving curves necessitates a series of short, angled scores closely spaced together․ Subsequently, carefully remove the excess tile fragments using tile nippers․ This method is time-consuming and yields less precise results than dedicated wet saws․ For intricate curves, consider alternative tools or accepting slight imperfections in the final shape․
Rip Cuts: Cutting Tiles to a Specific Width
Manual tile cutters excel at “rip cuts,” precisely reducing tile width․ Accurately measure and mark the desired width on the tile․ Position the tile firmly, aligning the mark with the cutter’s scoring wheel․ Apply consistent pressure for a clean score․ Utilize the breaking jaws to snap off the excess material, yielding a tile of the specified width․ Repeat if further reduction is needed, ensuring accuracy with each pass․

Troubleshooting Common Issues
Manual tile cutters can face scoring or breaking problems; wheel issues or slippage occur․ Maintaining cleanliness and consistent pressure are key to accurate cuts․
Scoring Issues: Wheel Problems and Solutions
Scoring problems with a manual tile cutter often stem from a dull or damaged cutting wheel․ Ensure the wheel is clean and free of debris, as contaminants hinder a clean score․ If scoring remains difficult, consider replacing the wheel; tungsten carbide wheels are common․ Applying sufficient, consistent pressure is crucial – too little results in a shallow score, while excessive force can damage the wheel․ Lubricants can aid cutting harder tiles, but always test in an inconspicuous area first․ Regular inspection prevents frustrating setbacks․
Breaking Problems: Uneven or Chipped Breaks
Uneven or chipped breaks when using a manual tile cutter frequently indicate improper snapping technique․ Ensure the scored line is directly aligned with the breaking jaws․ Apply even pressure – a slow, steady force is preferable to a quick snap․ For brittle tiles, reducing pressure can prevent chipping․ Inspect the breaking jaws for wear; damaged jaws cause inconsistent breaks․ Sometimes, a slight tap on the tile’s back can initiate a cleaner separation, minimizing imperfections and ensuring a professional finish․
Tile Slippage During Cutting
Tile slippage during scoring is a common issue with manual cutters․ Ensure the tile is firmly positioned against the cutter’s base and side supports before applying pressure․ A rubber mat or non-slip pad beneath the tile can significantly improve grip․ Verify the cutter’s feet are clean and provide stable contact with the work surface․ Avoid excessive force initially, as this can exacerbate slippage․ Consistent, controlled pressure yields a cleaner score and minimizes movement during the cutting process․
Maintaining a Clean and Accurate Cut
Achieving clean cuts requires a sharp, well-maintained cutting wheel․ Regularly clean the wheel to remove tile debris, preventing scoring imperfections․ Apply consistent, even pressure during scoring – avoid halting mid-line․ Inspect the base and scoring mechanism for any obstructions or damage․ Proper alignment and a stable work surface are crucial․ Following these steps ensures precise breaks and minimizes chipping, resulting in professional-looking tile work with your manual cutter․
Advanced Techniques
Manual cutters can handle glass and porcelain, but require adjustments and lubricants for difficult tiles․ Notched or shaped cuts demand careful marking and multiple scoring passes․
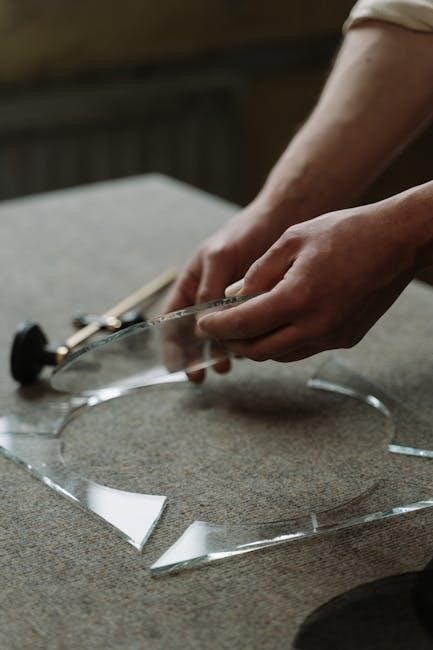
Cutting Glass Tiles with a Manual Cutter
Cutting glass tiles manually presents unique challenges․ Glass is more brittle than ceramic, demanding a very light scoring pressure to avoid shattering․ Employ a brand-new, sharp cutting wheel specifically designed for glass; a dull wheel will cause cracking instead of a clean break․
Lubrication, such as kerosene, is crucial to reduce friction and ensure a smooth score line․ Support the glass tile fully during scoring and breaking to prevent unwanted movement; Practice on scrap pieces first to master the delicate touch required for successful glass tile cuts․
Cutting Porcelain Tiles: Considerations and Adjustments
Porcelain tiles, known for their hardness, require careful handling with a manual cutter․ Increased scoring pressure is generally needed compared to ceramic, but avoid excessive force to prevent chipping․ A new, high-quality carbide-tipped cutting wheel is essential for clean cuts․
Lubrication can aid the scoring process, especially with dense porcelain․ Ensure the tile is firmly supported, and make multiple light passes rather than one heavy score․ Adjust the breaking jaws precisely for a controlled snap, minimizing the risk of damage․
Using Lubricants for Difficult Tiles
Lubricants, such as cutting oil or even kerosene, significantly ease scoring on dense or glazed tiles․ Applying a thin line along the intended cut path reduces friction between the wheel and the tile surface․ This minimizes wheel wear and prevents premature scoring failure, especially with porcelain․
Ensure the lubricant doesn’t pool excessively, as it can create a slippery surface․ Wipe away any excess before attempting to snap the tile, maintaining a secure grip and clean break․
Creating Notched or Shaped Cuts
Manual tile cutters aren’t ideal for complex curves, but notches and simple shapes are achievable․ Score multiple, closely spaced lines following the desired form, then carefully remove the excess tile pieces using tile nippers․ Precision is key; slow, controlled scoring prevents chipping․
For intricate designs, consider a wet saw․ Remember, manual cutters excel at straight lines, and attempting overly complex cuts risks tile breakage and frustration․
Tile Cutter Maintenance
Regular cleaning of the cutting wheel and lubrication of moving parts are crucial․ Inspect for wear, and promptly replace the wheel to maintain accurate, clean cuts․
Cleaning the Cutting Wheel
Maintaining a clean cutting wheel is paramount for optimal performance․ After each use, remove tile dust and debris with a brush or cloth․ Accumulated residue dulls the wheel, hindering scoring accuracy․ For stubborn buildup, a solvent like isopropyl alcohol can be applied cautiously․ Avoid abrasive cleaners, as they can damage the wheel’s carbide composition․ A clean wheel ensures smooth, precise scoring, extending its lifespan and delivering professional-quality tile cuts consistently․ Regular cleaning prevents chipping and uneven breaks․
Lubricating Moving Parts
Regular lubrication ensures smooth operation of your manual tile cutter․ Focus on the scoring mechanism and breaking jaws, applying a light machine oil to pivot points․ This reduces friction, preventing binding and ensuring consistent pressure during scoring․ Avoid over-lubrication, as excess oil attracts dust․ Wipe away any surplus․ Proper lubrication extends the cutter’s lifespan, maintains accuracy, and minimizes effort required for each cut․ Inspect frequently and reapply as needed for optimal performance and ease of use․
Inspecting for Wear and Tear
Routine inspection is crucial for a manual tile cutter’s longevity․ Examine the cutting wheel for chips or dullness, as this impacts scoring quality․ Check the base for cracks and ensure the scoring mechanism moves freely․ Inspect the breaking jaws for alignment and any signs of bending․ Look for loose screws or worn pads․ Addressing these issues promptly prevents inaccurate cuts and potential damage, ensuring safe and efficient tile work․ Regular checks maintain performance․
Replacing the Cutting Wheel
Wheel replacement is necessary when scoring becomes difficult despite cleaning․ Carefully loosen the wheel’s retaining screw, often requiring a specific Allen wrench․ Gently remove the old wheel and insert the new one, ensuring proper alignment with the cutter’s mechanism․ Tighten the screw securely, but avoid over-tightening․ A fresh wheel restores cutting precision, especially for harder tiles like porcelain․ Always use a compatible replacement wheel for optimal performance and safety․

Choosing the Right Tile Cutter
Selecting a manual cutter depends on tile type and thickness; consider cutter size, capacity, budget, and brand reputation for optimal results and longevity․
Factors to Consider: Tile Type and Thickness
When choosing a manual tile cutter, the tile’s material is paramount․ Softer tiles like ceramic are easily scored and snapped, while harder porcelain requires significant force and a specialized wheel․ Tile thickness dictates the cutter’s capacity; exceeding this limit risks damage to both the tile and the tool․
Consider the tile’s composition – glass tiles demand a delicate approach, potentially needing lubricants․ Always verify the cutter’s specifications align with your project’s tile characteristics for clean, safe cuts․
Cutter Size and Capacity
Manual tile cutter size directly correlates to the maximum tile length it can handle․ Larger format tiles necessitate cutters with extended bases and scoring wheels․ Capacity isn’t solely about length; thickness is crucial․ A cutter rated for 10mm tiles may struggle – or fail – with 15mm porcelain․
Consider your typical project size․ A small cutter suffices for mosaics, but floor tiling demands a robust, high-capacity model․ Prioritize a cutter that comfortably exceeds your usual tile dimensions․
Budget and Features
Manual tile cutter prices vary widely, from basic models under $50 to professional-grade cutters exceeding $200․ Features impacting cost include the base material (plastic vs․ metal), scoring wheel quality, and included accessories like tile supports․
Consider features like adjustable breaking jaws for different tile thicknesses and a robust ruler for accurate measurements․ While a higher budget often yields better precision and durability, assess your needs realistically․
Brand Reputation and Reviews
Researching brands is crucial when selecting a manual tile cutter․ Established manufacturers often prioritize quality and offer better customer support․ Online reviews provide valuable insights into real-world performance and potential issues․
Look for consistent feedback regarding cutting accuracy, durability, and ease of use․ Consider brands frequently mentioned in tiling forums or recommended by professional installers․ Prioritize cutters with positive ratings and detailed user experiences․
Alternatives to Manual Tile Cutters
Beyond manual cutters, snap cutters, wet saws, and tile nippers offer diverse cutting solutions․ Wet saws excel with porcelain, while nippers handle intricate shapes․
Snap Tile Cutters
Snap tile cutters represent a step up from purely manual options, providing increased leverage and efficiency․ They function by scoring the tile, similar to manual cutters, but utilize a hinged mechanism with a powerful snapping action․ This allows for quicker, cleaner breaks, especially on softer tiles․ While generally suitable for straight cuts, some models accommodate limited diagonal cuts․ They are often favored for their speed and relative ease of use compared to manual scoring and breaking, making them a popular choice for medium-sized tiling projects․
Wet Tile Saws
Wet tile saws, though distinct from manual cutters, offer capabilities beyond their reach․ Utilizing a continuous water flow, these saws cool the blade and minimize dust, enabling cuts through extremely hard materials like porcelain and glass․ They excel at complex shapes, miters, and bevels․ While requiring more setup and safety precautions, wet saws deliver unparalleled precision and versatility․ They are ideal for large-scale projects or when dealing with challenging tile types, surpassing manual methods in both speed and quality․
Tile Nipper
Tile nippers represent another alternative to manual scoring cutters, best suited for small, irregular cuts and detailed work․ These handheld pliers utilize opposing jaws to chip away at tile, creating curves, notches, or fitting pieces around obstacles․ While less precise than scoring or sawing, nippers offer flexibility for mosaic projects or minor adjustments․ They require patience and a steady hand, as achieving clean breaks demands careful, incremental chipping․ They are a useful supplement, not a replacement, for primary cutting tools․

Tile Cutting for Specific Projects
Manual tile cutters excel in backsplash installs, floor layouts, and mosaic work, alongside repairing damaged tiles, offering controlled cuts for diverse applications․
Backsplash Installation
Manual tile cutters are ideal for backsplash projects, enabling precise cuts around outlets and corners․ Achieving a professional finish requires accurate marking and scoring, followed by a clean break․ Consider the tile type; porcelain may need adjustments․ For intricate mosaics or scalloped designs, a manual cutter provides control, though smaller nippers assist with detailed shaping․ Remember to account for slight chipping and plan cuts accordingly for seamless integration with cabinetry and countertops․
Floor Tile Layouts
Manual tile cutters excel in executing floor tile layouts, particularly for straight patterns․ Careful planning minimizes waste by optimizing cuts․ For larger rooms, a consistent scoring pressure is crucial for uniform results․ Rip cuts, achieved with precision, ensure tiles fit snugly against walls․ Diagonal layouts demand accurate angle marking and controlled breaking․ Remember to account for doorway transitions and plan cuts to conceal imperfections, creating a visually appealing and durable floor․
Mosaic Tile Work
Manual tile cutters, while not ideal for intricate curves, can assist in mosaic projects by creating consistent small tile pieces․ Precise scoring and snapping are vital for uniform shapes․ Utilizing a tile nipper alongside the cutter allows for customized adjustments․ Patience is key, as numerous cuts are required․ Consider the tile type; glass tiles demand a lighter touch to prevent shattering․ Careful planning minimizes waste and ensures a cohesive mosaic design․
Repairing Damaged Tiles
Manual tile cutters prove invaluable when replacing broken tiles․ Accurately matching the existing tile’s size is crucial; the cutter facilitates precise cuts for a seamless repair․ Carefully score and snap replacement tiles to the required dimensions․ Prioritize a clean break to avoid chipping․ A steady hand and proper technique minimize damage during the cutting process, ensuring a flush fit and restoring the tile surface’s integrity․ Safety glasses are essential during this process․